Outbuildings are a sorry lot. They generally are “creatively” constructed, receive the least maintenance attention, and often undergo heavy use. There are countless garages throughout Rochester that were built on a shoe-string budget 100 years ago that gently lean or twist in the direction of the prevailing winds or sink toward an improperly routed downspout. Many have not seen a coat of paint in decades, some have half-rotten vehicle doors, while others have boarded up windows. Back when we were house shopping, nearly every house in our budget had a garage that was afflicted by one if not many of these conditions.
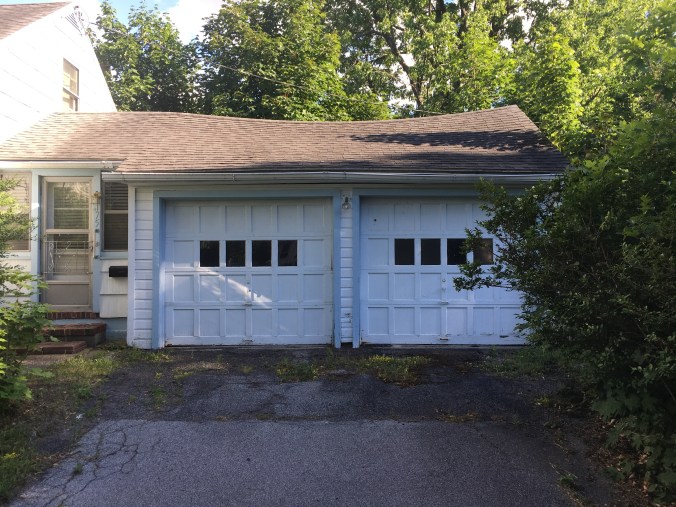
I neglected to take any photos of the garages I saw during our house search, but this one in our neighborhood is a pretty good example.
Fred Tosch, the builder/designer of our house, made a point of constructing the garages of his houses with an actual concrete foundation, sufficient framing, and cross-bracing to boot. Unfortunately, he could not ensure that the garages were cared for in the same manner they were constructed. Ours was still plumb and level, with nary an errant slope or curve to be seen, but the shingles had not been replaced when the house was re-roofed about 15 years ago, the wood clapboard siding, while not encased in vinyl like the house, looked to have been run over with an industrial peeler, the garage doors were unsightly and rusted, and the steep slope at the back edge of our property had caused debris and dirt to accumulate against the back wall of the garage.
Although never an ideal situation, it is important to know the value “mothballing” a building when current budgets do not allow you to achieve your rehabilitation/restoration dreams. With this in mind, one of the first things I did during the summer in 2014 was rake/scrape the two inches of moss that had accumulated on the north slope of the garage roof, filling our 96-gallon garbage can. We then fastened a grey tarp over the whole roof to try to keep the structure dry as many of the shingles were so deteriorated that only the fiberglass felt backing was left.
During the summer of 2016 we started Phase 1 of stripping the deteriorated paint from the walls, but unfortunately did not get very far, as we were more concentrated on the primary goal of repairing the roof structure and re-roofing the garage (Phase 2). At the northeast corner of the garage, the moss and deterioration were so bad that I punched a two-inch diameter hole through the roof by accident with a broom handle. There were other areas in the field of the roof were leaks had been ongoing rotting the beautiful tongue and groove roof sheathing beneath.
Before applying new shingles, we sistered three of the roof rafters at the northeast corner, and luckily found some great clear vertical grain western red cedar t & g boards to stitch in repairs where the original sheathing had rotted. Unfortunately, when originally constructed, the carpenters did not project the roof sheathing beyond the fascia boards where the gutters were mounted. This design flaw had led to ongoing deterioration. In order to correct this and to provide more rigidity, we fastened a layer of 1/2″ plywood over the top of the original sheathing. Back in 1928, the house and garage were outfitted with Johns-Manville asbestos slate shingles, copper flashings, and copper gutters. It has always been our intent to bring back this character-defining feature as best we can. After a lot of consideration, we settled on GAF Camelot shingles. They have a similar reveal length and width to the Johns-Manville originals, and their “Williamsburg Slate” color included the same shades described by the newspaper documentation on the house. I ordered copper flashings and got a quick tutorial on carefully crafting the miter joints from the guys at CSTM Corporation, and we were off and running. Although not necessary for an unheated structure, we added a ridge vent to help with the air-movement inside the garage and incorporated an exposed copper ridge flashing to help prevent biological growth on the north slope of the roof. Although we didn’t have quite enough money to install the copper gutters (yet), the much-needed overhang and well-formed drip edge flashings mitigated much of the issue.
Kit and I were both really happy with our renewed garage and liked to joke that our garage had a fancier roof than any other house in the neighborhood. However, this was to quickly change this year.
We fancy ourselves as living a sustainable lifestyle with our used Prius, time-capsule house, farmers’ market food, and use of local transit. As many readers of this blog well know, “the greenest building is the one already built,” however, the idea of combining the conservation approach of architectural preservation with modern renewable energy production seemed like a double win. The installation of solar panels specifically on historic buildings necessitates an interesting negotiation between sustainability goals and architectural aesthetics and historic integrity issues. I had been keeping a curious watch on the handful of solar arrays that were installed on designated landmarks in Rochester and became familiar with the precedent the City’s Preservation Board began to establish:
- The panels are not to be located, whenever possible, on a primary (street facing) facade.
- The panels are to be mounted close and parallel to a roof surface.
- The panels, frames, and mounting hardware should be all black, with the solar cells indistinguishable from the rest of the assembly.
- Avoid installation on a cross gable with the resultant stair-stepped configuration.
Our garage’s side-gable roof faces due south, its slope of ~27º is a nearly ideal mounting angle for our latitude, and with the large street trees on our section of the block being long since removed, our solar exposure was nearly wide open. The south side of the garage is the primary facade, however, it is an “accessory structure” and is located very near the rear lot line of our property. Given the changing political landscape in Washington DC, I was worried that these solar tax credits I had heard about might be at risk of going away. So, during the spring I began looking into the tax-credits and incentives surrounding residential solar panels. Adding together a 30% Federal solar tax credit, a 25% NY State solar tax credit, a ~5% NY State solar tax incentive, and (believe it or not) a 20% NY State Historic Homeowner Rehabilitation Tax Credit…the math was not difficult to understand the fortuitous situation we were in. I started researching the few companies locally that install solar panel arrays and had done work on historic properties. After crunching the numbers and specifics regarding the panel array, we decided to work with SunCommon of NY. Our array of twelve panels has a maximum power production of 3.84 kW per hour, which would cover about 60% of our current usage. With nearly 80% of the installation cost coming back, our payback period on our system warranteed for 25 years, was a whopping four years, the remaining 21 years of production would net savings in the realm of $15K. After securing review and approval by both the New York SHPO and our Historic Preservation Commission, construction began.
The panels are attached to rails which are secured to mounts that anchor into the roof rafters. The mounts are specifically designed with an integrated flashing foot that creates a water-tight connection. All components are fabricated from black anodized aluminum to help make them disappear…although I think the biggest plus visually was having panels that near perfectly fill the entire roof surface. Each panel has its own separate power optimizer which allows it adapt to shading and other possible interference without affecting the whole system. The whole system is fed into system disconnect mounted on the inside of the garage before a barely visible conduit runs underground from the garage to our house and connects to a DC /AC inverter near the main electric panel. The inverter is connected to the internet so that the whole system can be monitored remotely by SunCommon and us…which also means we can keep track of our power production.
Although we have a sandy muddy stripe running through the yard from the trench they dug for the conduit, we are very pleased with the final product and have already produced +80 kWhr of electricity in the first two weeks which were primarily cloudy.

The panels and partially primed garage in all their glory.
Concurrently with the installation, I was able to get some more stripping completed on the siding and we finally sanded and primed the front of the garage. We are going to hold ourselves to the promise that we will finish the stripping and painting of the garage next year…because come on already!
Thanks to everyone who is still reading despite the absence of posts over the last several months. Now with the cold weather, I should be able to get some more posts up about our progress and finally some of the history of the house!

I am enjoying reading your blog. I have always wondered – what is the purpose of the garage bump out?
Thanks for reading! The bump-out on the garage was built in 1965 by the second owner Frederick Stadtmueller. It could have been for extra storage or to accommodate a larger car as the garage is only 18′-6″ square (on the outside). We use it for storing some of our patio furniture.