It’s been bitterly cold this week with lots of snow after near spring like conditions began to force some early bulbs to flower last week…thanks upstate New York. What better time to talk about the incremental saga of tuning, upgrading, and rehabbing our steam heating system.
Our house was originally outfitted with a cutting edge American Radiator Company steam heating system comprising of an Ideal Redflash Boiler and Corto radiators. I have a strong affection for Corto radiators, whose timeless design conceived by French industrial designer Louis Courtot in 1917 strike a delicate balance between efficient function (with their vastly expanded surface area, key to convection) and beautifully refined proportions. American Radiator even went to the length of producing an elaborately illustrated pamphlet celebrating the Corto, seen here. The Ideal Hotcoil water heater was also installed to complete the American Radiator Company trio. Not surprisingly the only portion of this system that survived the decades were the Corto radiators, however I’ve seen more than one person online proudly sharing photographs of their still functioning and beautiful Redflash boiler….sigh if only.
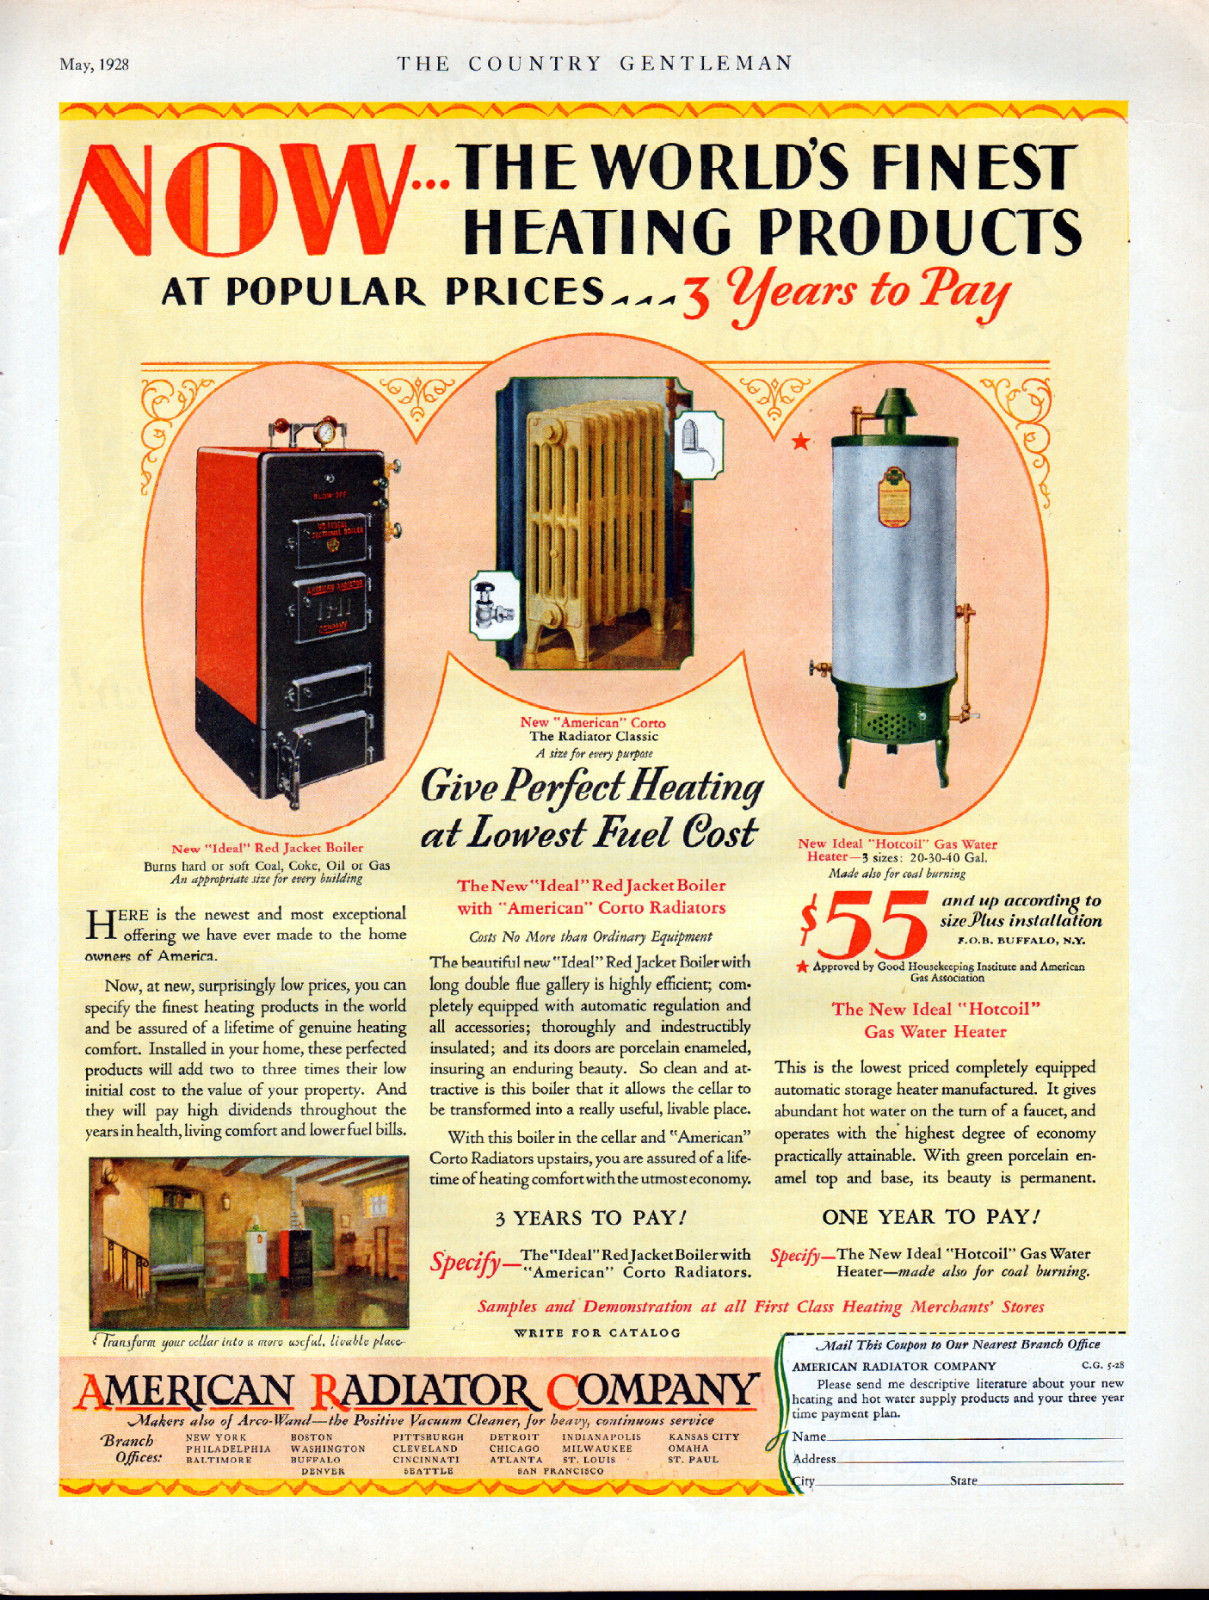
Here’s a 1928 ad showing all the original components of our system.
As mentioned in an earlier post our steam heating system was plagued by gluttonous fuel consumption, short-cycling, and uneven heating…we should probably just tear it out and be done with it right? After doing a bit of research and on the advice of a friend I bought a few of Dan Holohan’s books on steam heating. After trying to wrap my head around the art of steam I spent hours on “The Wall” of Mr. Holohan’s website HeatingHelp talking to several steam pros who were generous with their advice and guidance. We started by making incremental improvements to the system by first replacing our old standard dial thermostat with a programmable one compatible with steam. Then we replaced all of the radiator vents with high-quality Gorton vents tailored to each radiator’s location and size in the system, and adding large main vents to balance the air venting rate of the system.
The big reveal part of this project though was precipitated by an unfortunate situation regarding our beautiful hardwood floors. About a year or so after we had our first floor and staircase refinished I began to notice that several areas of the finish were beginning to delaminate. This was not the type of hard-wearing conversion varnish floor finish I am accustomed to, so I gave our floor refinishing contractor Ray Case Floors a call. Ray came over almost immediately to observe the condition of our floors. He concluded that some foreign contaminate or insufficient curing time had caused the finish to prematurely fail. Completely unprompted…and this highlights the kind of craftsperson Ray Case is…he offered to redo all of his work for free at our convenience. This necessitated moving all of the first-floor radiators back out of the house. After an afternoon of sweating, heaving, and straining Kit stated, “There’s no way I’m moving these things out of the house again, so we’re refinishing them now or never!”

Here’s Ray being an upstanding dude on what was supposed to be a weekend with his family.
I called around to a few metal refinishing shops around town and settled on working with Sandblast Service. They had refinished hundreds of radiators throughout the years and so had a pretty good handle on their intricacies. We rented a cargo van, got all of the first floor radiators minus the kitchen, and the tiny bathroom radiator (probably the ugliest and rustiest of the bunch) up into it, and carted them over to their shop. They were blasted down to bare metal, then coated with a zinc primer and two coats of an industrial polyurethane coating. We settled on a dark steely grey for the downstairs radiators so that they had a visual presence that belied their pragmatic purpose, but did not stand out. The small bathroom radiator was made glossy jet black to coordinate with the tile. We got them back inside and reinstalled just as the weather broke in mid-October. They look great, and I am so happy we splurged on getting them professionally done.
Unfortunately, the radiator vents still gurgle and occasionally hiss because of how absurdly oversized our boiler is and the faulty near boiler piping that causes the steam to be heavy and moist. I drew up several piping diagrams to reconfigure the near boiler piping, and following a lot of valuable feedback I finalized the design and we intend to complete the re-piping work this summer to further enhance our system.

There is a lot going into this that Dan Holohan and others go to great lengths to explain.
Stay tuned for this summer when my dad and I do our best impression of Large and Son Plumbing and hopefully get everything back together by the heating season!

Interesting, I have the same radiators but they’re hydronic.